

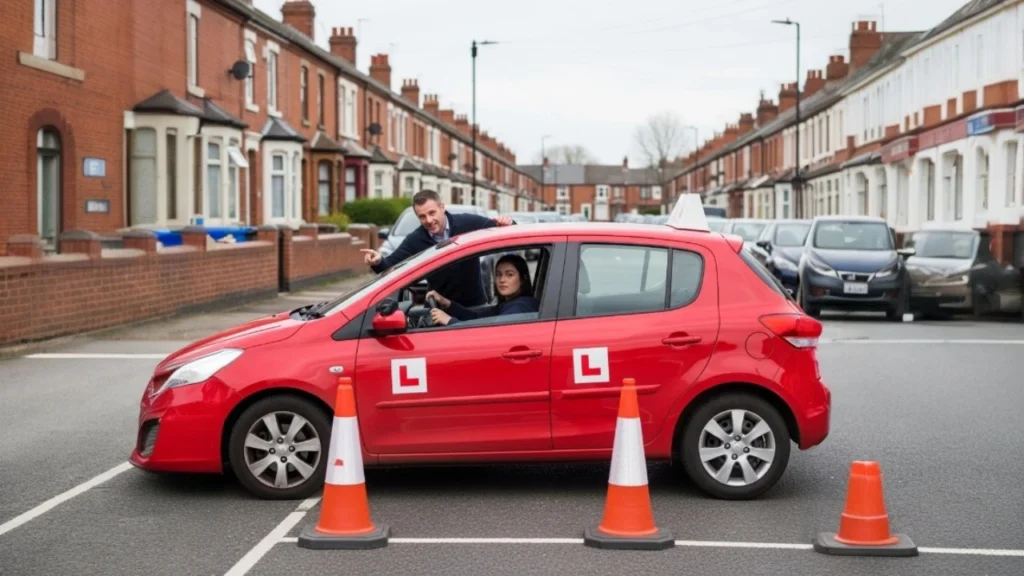
For many learner drivers, reverse parking feels daunting. The thought of manoeuvring backwards into a tight space between white lines – under the watchful eye of a driving test examiner – can be nerve-wracking. But here’s the truth: reverse parking is actually the preferred parking method for confident drivers. It gives you better control when positioning your car and, most importantly, makes driving out of the space much safer (no more reversing blindly into moving traffic).
This easy guide will walk you through everything you need to know – from the step-by-step reverse bay parking method using reference points, to common mistakes that cause test failures, and what examiners are really looking for. Whether you’re learning with a driving school in Ilford or have found the cheapest driving instructor near me, mastering reverse parking will boost your confidence and test readiness. And while you’re building your practical skills, understanding the UK penalty points system will help you stay safe and legal on the road for years to come .
Part 1: Two Types of Bay Parking – Which Will You Be Tested On?
Before we dive in, it’s important to understand the two bay parking manoeuvres you might be asked to perform on your driving test:
| Type | What You Do | When It’s Used |
|---|---|---|
| Reverse Bay Parking | Reverse into the bay, then drive out forwards | Most common on the test |
| Forward Bay Parking | Drive forwards into the bay, then reverse out | Less common, but may be asked |
The examiner will tell you which one to perform. Listen carefully to the instructions before you begin. This guide focuses on reverse bay parking – the manoeuvre most likely to appear on your test and the most practical for real-world driving because it gives you better visibility when exiting.
Part 2: Before You Start – Choose the Right Bay
Choosing the right bay is your first step to success. Before you begin the manoeuvre:
- Look for a bay with empty spaces on either side if possible – this gives you more room and makes observation easier
- Avoid spaces next to large vehicles that may block your view
- Make sure the bay is free of obstructions – no trolleys, pedestrians, or other hazards
- Check that the bay lines are clearly visible
Pro tip: Some test centres have bays specifically marked for the test – your instructor will help you practise on these.
Part 3: Step-by-Step Reverse Bay Parking
Step 1: Position Your Car (The “Two Bay” Rule)
Drive slowly past the bays, keeping roughly 1 to 1.5 metres (about a car’s width) away from the row of parking spaces. This gives you enough room to steer smoothly into the bay.
Key reference point: Drive past your target bay and stop when the rear of your car is about two bays past the one you want to park in. For example, if you want bay number 3, drive until you’re roughly level with bay number 5.
Step 2: Select Reverse Gear and Check Your Surroundings
Before moving an inch, you MUST do a full 360° observation check:
- Check all mirrors (interior, left, right)
- Look over both shoulders for pedestrians, cyclists, and other vehicles
- Check your blind spots (over both shoulders) – many learners fail because they skip this
- Give way to any approaching traffic or pedestrians
Remember: observation is the #1 reason drivers fail manoeuvres – not bad parking. Examiners are watching your safety checks closely.
Step 3: Begin Reversing Slowly
Use gentle clutch control (or light brake pressure in an automatic) to move at a slow, steady walking pace. Take your time – there’s no time limit on the manoeuvre.
Key reference point: Watch your door mirror. The first white line of your target bay should become visible in your mirror just before you begin your turn.
When you see that first line, start turning the steering wheel fully towards the bay (e.g., full lock left if the bay is on your left).
Step 4: Monitor Your Progress in the Mirrors
Keep checking both your side mirrors as you reverse. Your goal is to keep the car centred between the white lines.
Key reference point: When the bay lines appear parallel in both your side mirrors, it’s time to straighten your steering wheel. The car should now be aligned with the bay.
Step 5: Straighten and Adjust as Needed
Once the car is straight and entering the bay:
- Straighten your wheels completely
- Continue reversing slowly
- Stop when your car is fully inside the bay
- Make sure you’re not too far forward or too far back
It’s okay to adjust! If you’re off-centre, it’s completely acceptable to pull forward and correct your position. Examiners don’t expect perfection on the first attempt – they want to see that you can safely correct your mistakes.
Step 6: Final Parking Position
Once parked, check that:
- Your car is centred between the two white lines
- You’re not sticking out into the driving lane
- You have enough room on either side for doors to open
Then apply the handbrake and go into neutral (or ‘Park’ in an automatic).
Part 4: Forward Bay Parking Summary (If You’re Asked)
If the examiner asks you to forward park (drive in forwards and reverse out):
- Choose your bay and approach slowly
- Signal early to indicate your intention
- Align your side mirror with the first line of the bay you’re entering
- Turn the wheel fully towards the bay
- Drive slowly in, straightening as you go
- Stop with your car centred and fully within the bay
Forward bay parking feels more natural, but you’ll then need to reverse out safely. Before reversing out, do a full 360° observation check just like you would in reverse bay parking.
Part 5: Common Reverse Parking Mistakes (And How to Avoid Them)
❌ Mistake 1: Poor Observation
Why it’s a problem: Not checking mirrors and blind spots before and during the manoeuvre is a serious fault. Examiners report that missed observation is one of the most common reasons to fail a manoeuvre.
How to avoid it: Do a full 360° observation check before you start reversing. Continue checking mirrors throughout. Make your head movements obvious so the examiner can see you’re checking.
❌ Mistake 2: Poor Clutch Control and Stalling
Why it’s a problem: Jerky movements or stalling show the examiner you lack control of the vehicle.
How to avoid it: Practise moving at a slow, steady walking pace. Use your clutch biting point to control speed – don’t rush.
❌ Mistake 3: Touching or Mounting the Kerb
Why it’s a problem: Touching the kerb may be a minor fault, but mounting the pavement is a more serious issue.
How to avoid it: Keep your speed very slow so you can stop and correct if needed. Use your mirrors to monitor your position relative to the lines.
❌ Mistake 4: Finishing Outside the Bay Lines
Why it’s a problem: Ending up with your wheels outside the bay lines or overlapping into another space is a clear fault.
How to avoid it: Check both side mirrors as you reverse. If you’re off-centre, pull forward and adjust. It’s allowed!
❌ Mistake 5: Too Many Repositionings
Why it’s a problem: While small adjustments are fine, excessive back-and-forth manoeuvring shows a lack of control.
How to avoid it: Practise until you can get it right in 1-2 attempts. Use reference points to position yourself accurately.
Part 6: Reference Points – Your Secret Weapon
Reference points are specific visual markers that help you position the car accurately. While they vary slightly between cars, here are the key ones to practise with your instructor:
| Reference Point | What It Tells You |
|---|---|
| Door mirror position | When the first bay line appears level with your door mirror, it’s time to start turning |
| B pillar (the pillar between front and rear doors) | Helps you judge when to straighten the wheel |
| Wing mirror view | When the bay lines are equal on each side in both mirrors, you’re centred |
| Front stopping point | Stop before your bonnet reaches the bay line or any obstacle ahead |
Every car is slightly different. Practise with your instructor to find what works best for your specific vehicle.
Part 7: What Examiners Look For During Reverse Parking
During your driving test, the examiner is assessing four key areas during any reversing manoeuvre:
| Assessment Area | What They Want to See |
|---|---|
| Observation | Full 360° checks before reversing, and continued observations throughout |
| Control | Smooth clutch control, steady speed, no stalling |
| Accuracy | Finishing within the bay lines, reasonably centred |
| Safety | Giving way to other road users, not causing hazards |
You need less than 15 minor driving faults and no major or dangerous faults to pass. Minor mistakes (like needing to adjust your position) usually won’t cause you to fail – but serious faults (like missing a pedestrian in your blind spot) will.
One common misconception: Hitting the kerb doesn’t automatically mean you’ve failed. A small touch is usually a minor fault. It’s about how you respond – stopping safely and correcting is fine.
Part 8: Reverse Bay Parking in Different Weather
Your manoeuvre might be tested in rain, wind, or poor light. Here’s how to adapt:
| Condition | How to Adjust |
|---|---|
| Rain | Bay lines can be harder to see. Take extra time to align your car. Slow down even more. |
| Poor light | Use your headlights. Ensure your mirrors are demisted before you start. |
| Wind | Be aware that opening your door might be harder. Hold it securely. |
| Busy car park | If it’s too busy, the examiner may ask you to move to a different bay or choose a different manoeuvre |
Pro tip: A good driving school will make sure you practise in different weather conditions so you’re prepared for anything on test day.
Part 9: How Many Points for Speeding? Useful Knowledge for New Drivers
While mastering reverse parking is essential for passing your test, staying safe after you pass is equally important. As a new driver, you need to be aware of the UK penalty points system – because your first two years on the road carry extra risk.
For new drivers: The minimum penalty for speeding is a £100 fine and 3 penalty points. Receive 6 points within your first 2 years – your licence is revoked, and you start over.
If you’re caught speeding in certain ranges, you might be offered a National Speed Awareness Course instead of points and a fine. Completing the course avoids both fine and points. But be aware: you can only take it once every three years, and some forces exclude you if you already have a clean licence.
Of course, the best approach is to never break the speed limit at all – safe driving is at the core of everything we teach at our driving school. It’s also worth exploring our UK Penalty Points System: A Complete Guide for New Drivers for more details.
Part 10: Practice Exercises to Build Confidence
Beginner Exercise
In an empty car park, set up two cardboard boxes or cones to mark a “bay”. Practise reversing between them slowly. Focus only on control and observation – not speed.
Advanced Exercise
Once comfortable, add other “vehicles” (more cones) on either side of your bay. Practise judging the space and centring the car.
Test Simulation
Have a friend or family member act as “examiner” and give you instructions. Simulate test conditions – including the pressure of being watched.
The Mock Test
As you approach your test date, ask your instructor to include reverse bay parking in a full mock test. Practise under exam conditions to build confidence.
Part 11: Quick Reference – Reverse Bay Parking Checklist
| Step | Action |
|---|---|
| ✅ 1 | Choose a safe bay (empty spaces either side if possible) |
| ✅ 2 | Position car about 1-1.5m from bays, stop when rear is two bays past target |
| ✅ 3 | Select reverse gear |
| ✅ 4 | Do full 360° observation check (mirrors + blind spots) |
| ✅ 5 | Reverse slowly using clutch control |
| ✅ 6 | Turn wheel fully towards bay when first line appears in door mirror |
| ✅ 7 | Check both mirrors – monitor bay lines |
| ✅ 8 | Straighten wheels when lines appear parallel in mirrors |
| ✅ 9 | Adjust if needed (pull forward and correct) |
| ✅ 10 | Stop when centred between lines |
| ✅ 11 | Apply handbrake, neutral/Park – manoeuvre complete |
Part 12: Useful Language for Learners
For the “tell me” question: The examiner may ask: “Tell me how you’d check your blind spots before reversing.”
Your answer: “I would check all my mirrors, then glance over both shoulders to check my blind spots for any pedestrians, cyclists, or other vehicles before I begin to reverse.”
Conclusion: From Nervous to Confident
Reverse parking is a skill that improves with practice. Every confident driver started exactly where you are – nervous, unsure, and occasionally straddling the white lines. But with the right technique, reference points, and enough practice, you’ll master it.
Remember:
- Go slowly – speed is not your friend in reverse parking
- Observe constantly – mirrors and blind spots before, during, and after
- Use your reference points – they’re there to help you
- Adjust if needed – perfection doesn’t have to come on the first try
Get to a quiet car park and practise until the manoeuvre feels natural. Once it clicks, you’ll wonder why it ever seemed difficult.
Ready to master reverse parking with expert guidance?
📞 Call Driving Academy Ltd at 07399 696344 – Our patient instructors in Ilford and London will help you build confidence in every manoeuvre.
📧 Email: drivingacademyltd@gmail.com
📍 Visit Us: 101 Whitechapel High Street, London, E1 7RA
Your journey to confident parking starts here. Book a lesson today.