

A clean car interior isn’t just about pride; it’s a crucial component of safety and confidence for every driver, especially for learners. At Driving Academy Ltd, we know that a well-maintained vehicle provides the best learning environment. This guide combines essential car interior cleaning tips with vital reminders about UK seatbelt and car safety rules to ensure your car is spotless, safe, and test-ready. Cleanliness and safety go hand-in-hand, and both are part of the responsible mindset we instil in every student. Ready for a lesson? Contact us on 📞 07399 696344, email 📧 drivingacademyltd@gmail.com, or visit 📍 101 Whitechapel High Street, London, E1 7RA.
The Clear Link: A Clean Car is a Safer Car
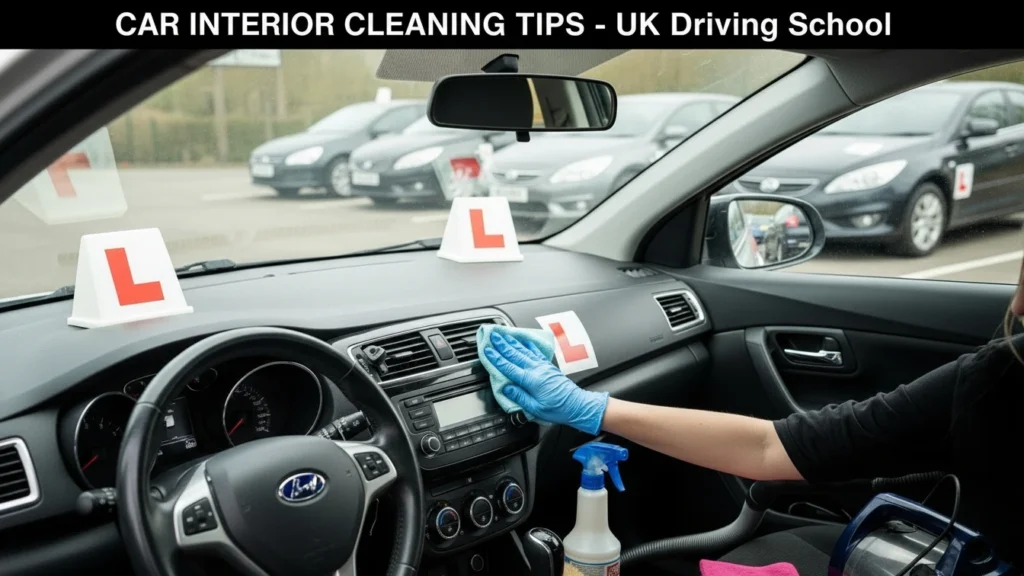
Before we dive into the cleaning, let’s connect the dots. A dirty car isn’t just unsightly—it’s a hazard. Grime on windows creates dangerous glare at night, obstructed footwells can interfere with pedal control, and debris can jam under seats. Furthermore, a clean car allows for quick and easy checks of vital UK seatbelt and car safety rules, such as ensuring seatbelts retract properly and aren’t frayed. This attention to detail is something we emphasise to all our students at our driving school in Ilford, as it forms part of the vigilant attitude needed to pass your UK Driving Theory Test and practical exam.
Your Step-by-Step Car Interior Cleaning Guide
Follow this systematic approach to transform your car’s cabin from cluttered to clinical. Perfect for any student success story—treat your first car or your instructor’s dual-control vehicle with the respect it deserves.
Phase 1: The Declutter & Prep
- Remove Everything: Take out all personal items, mats, rubbish, and any loose change. This is your chance to reset.
- Vacuum is King: Use a strong vacuum with various attachments. Start high (ceiling, vents) and work down to the seats and finally the floors. Use a crevice tool for the tight gaps between seats and the centre console where crumbs and dirt love to hide.
- Pre-Treat Stains: Identify any spills on upholstery or carpets and apply a suitable fabric cleaner. Let it sit according to the product instructions before moving to the next phase.
Phase 2: Deep Cleaning Surfaces (A Material-Specific Guide)
| Surface | Best Tools & Products | Pro-Tip from Instructors |
|---|---|---|
| Fabric Seats & Carpets | Upholstery cleaner, microfibre cloths, soft-bristled brush. | Always test cleaner in an inconspicuous area first. Agitate with the brush, then blot—don’t rub—to lift stains. |
| Leather & Vinyl Seats | Dedicated leather cleaner and conditioner. Soft microfibre cloths. | Conditioning is key! It prevents cracking and keeps the material supple. Avoid household soaps which will dry it out. |
| Dashboard & Plastic Trim | All-purpose cleaner (diluted), detailer brush, microfibre cloths. | Use the detailer brush to clean air vents and intricate buttons. A UV protectant spray helps prevent sun fading and cracking. |
| Windows & Mirrors | Glass cleaner, a second dry microfibre cloth. | Never use on dash first! Clean windows last to avoid overspray on other surfaces. Use a ‘Z’ pattern and buff with the dry cloth for a streak-free finish essential for clear observation. |
Phase 3: The Final Details
- Deodorise: Don’t just mask odours—eliminate them. Use a fabric deodoriser or place an open box of baking soda under a seat overnight to absorb lingering smells.
- Clean Seatbelts: Extend them fully and wipe down with a cloth dampened with mild soapy water. Let them air dry completely before retracting. This is a direct safety check!
- Replace Mats: Once the floors are dry, put back clean mats. Consider durable rubber mats for the winter months to protect your carpets.
The Safety Check: Integrating UK Rules with Your Clean
Once your interior is gleaming, it’s the perfect time to perform a quick safety audit, just as we teach in our lessons. This habit could be the foundation of your own student success story.
- Seatbelts: As you cleaned them, you checked for smooth retraction. Now, give each one a firm tug to ensure the locking mechanism engages.
- Footwells: Ensure they are completely clear. An old water bottle rolling under the brake pedal is a recipe for disaster.
- Visibility: Your streak-free windows and mirrors are now optimised for safe driving, reducing glare and ensuring you can complete effective observations—a key test marking criterion.
A Driving School Student Success Story: Emma’s Clean Start
“Before I started lessons with Driving Academy Ltd, my dad’s car was a bit of a tip,” says Emma, a recent pass graduate. “My instructor made a point of showing me how to quickly check the cabin was safe and tidy before we set off. It made me feel more in control. When it came time for my test, I did my ‘cockpit drill’ confidently—adjusting the seat, mirrors, and checking for obstructions. The examiner commented on my thoroughness. Keeping the car clean wasn’t just for show; it was part of the routine that helped me pass first time!”
FAQs: Keeping Your Car Clean & Compliant
Q1: How often should I clean my car’s interior?
A: A quick tidy and vacuum once a week is ideal. A full deep clean every 2-3 months will keep it in top condition. For learner drivers using their driving school‘s car, always leave it as you found it.
Q2: Can a dirty car interior affect my driving test?
A: While not a direct fail, a severely cluttered or dirty car that impedes your operation of controls (e.g., a stuffed footwell) could be marked as a serious fault. It also creates a poor impression.
Q3: What’s the one cleaning task most linked to safety?
A: Cleaning all windows and mirrors thoroughly. Unobstructed visibility is non-negotiable for safe driving and is a core part of the ‘show me, tell me’ section of the driving test.
Q4: I’m a learner in Ilford. Do I need to clean my instructor’s car?
A: While your instructor maintains the vehicle, showing respect by not leaving rubbish and wiping your feet is always appreciated. It’s a sign of the responsibility we foster at our driving schools in Ilford.
Q5: Are there cleaning products I should avoid?
A: Yes. Avoid bleach, abrasive cleaners, or anything not designed for automotive interiors. They can damage plastics, dyes, and protective coatings. Stick to products made for the specific material.
Conclusion: Drive Proud, Drive Safe, Drive Clean
A clean car reflects a disciplined, safe driver. By combining these car interior cleaning tips with a constant awareness of UK seatbelt and car safety rules, you’re not just maintaining a vehicle; you’re cultivating the meticulous, responsible attitude that defines a great driver.
It’s the same attitude we champion at Driving Academy Ltd, where every lesson is a step towards not just passing a test, but mastering the road. Let your student success story begin with attention to detail, inside and out.
Ready to learn in a pristine, safe, and professional environment? Contact Driving Academy Ltd today to book your first lesson.
📞 07399 696344 | 📧 drivingacademyltd@gmail.com | 📍 101 Whitechapel High Street, London, E1 7RA